The model is a free model found on MyMiniFactory designed by user Printed Obsession.
Here is the link to the model: https://www.myminifactory.com/object/3d-print-alien-xenomorph-full-figure-25-cm-82660
Model Description:
The main "villain" also known as a Xenomorph, of the movies Alien, Aliens, Alien 3 (lets pretend this one never existed), Aliens: Resurrection.
Printer and resin used:
Elegoo Mars 2 Pro
ANYCUBIC Rapid Resin - Translucent Green
Paints:
Unless otherwise stated, all the paints are from the Army Painter D&D line of paints
Steps and Planning:
I started by printing the parts, the tail taking the longest since it had to go taller.
Lets start by saying, this resin didn't feel like it was good compared to the eSun Gray I used on the Judgement model.
I saw more layer shifting with this one and the joining parts didn't come out with clean straight lines. Could have been the supports, but I did the same thing I did on the Judgement model and her parts fit right out of curing, mind you I had to refine it some, but not nearly as much as this green one.
Once printed they came out looking pretty good other then some layer shifts (fixable with a few layers of primer).
The putty in the mouth is there to protect the teeth. I don't want them to get painted at all other then with a high gloss varnish.
Since the teeth are translucent, it will fit in with the look that you see in the movies, how they are somewhat clear like icicles in the winter. That's the hope anyways.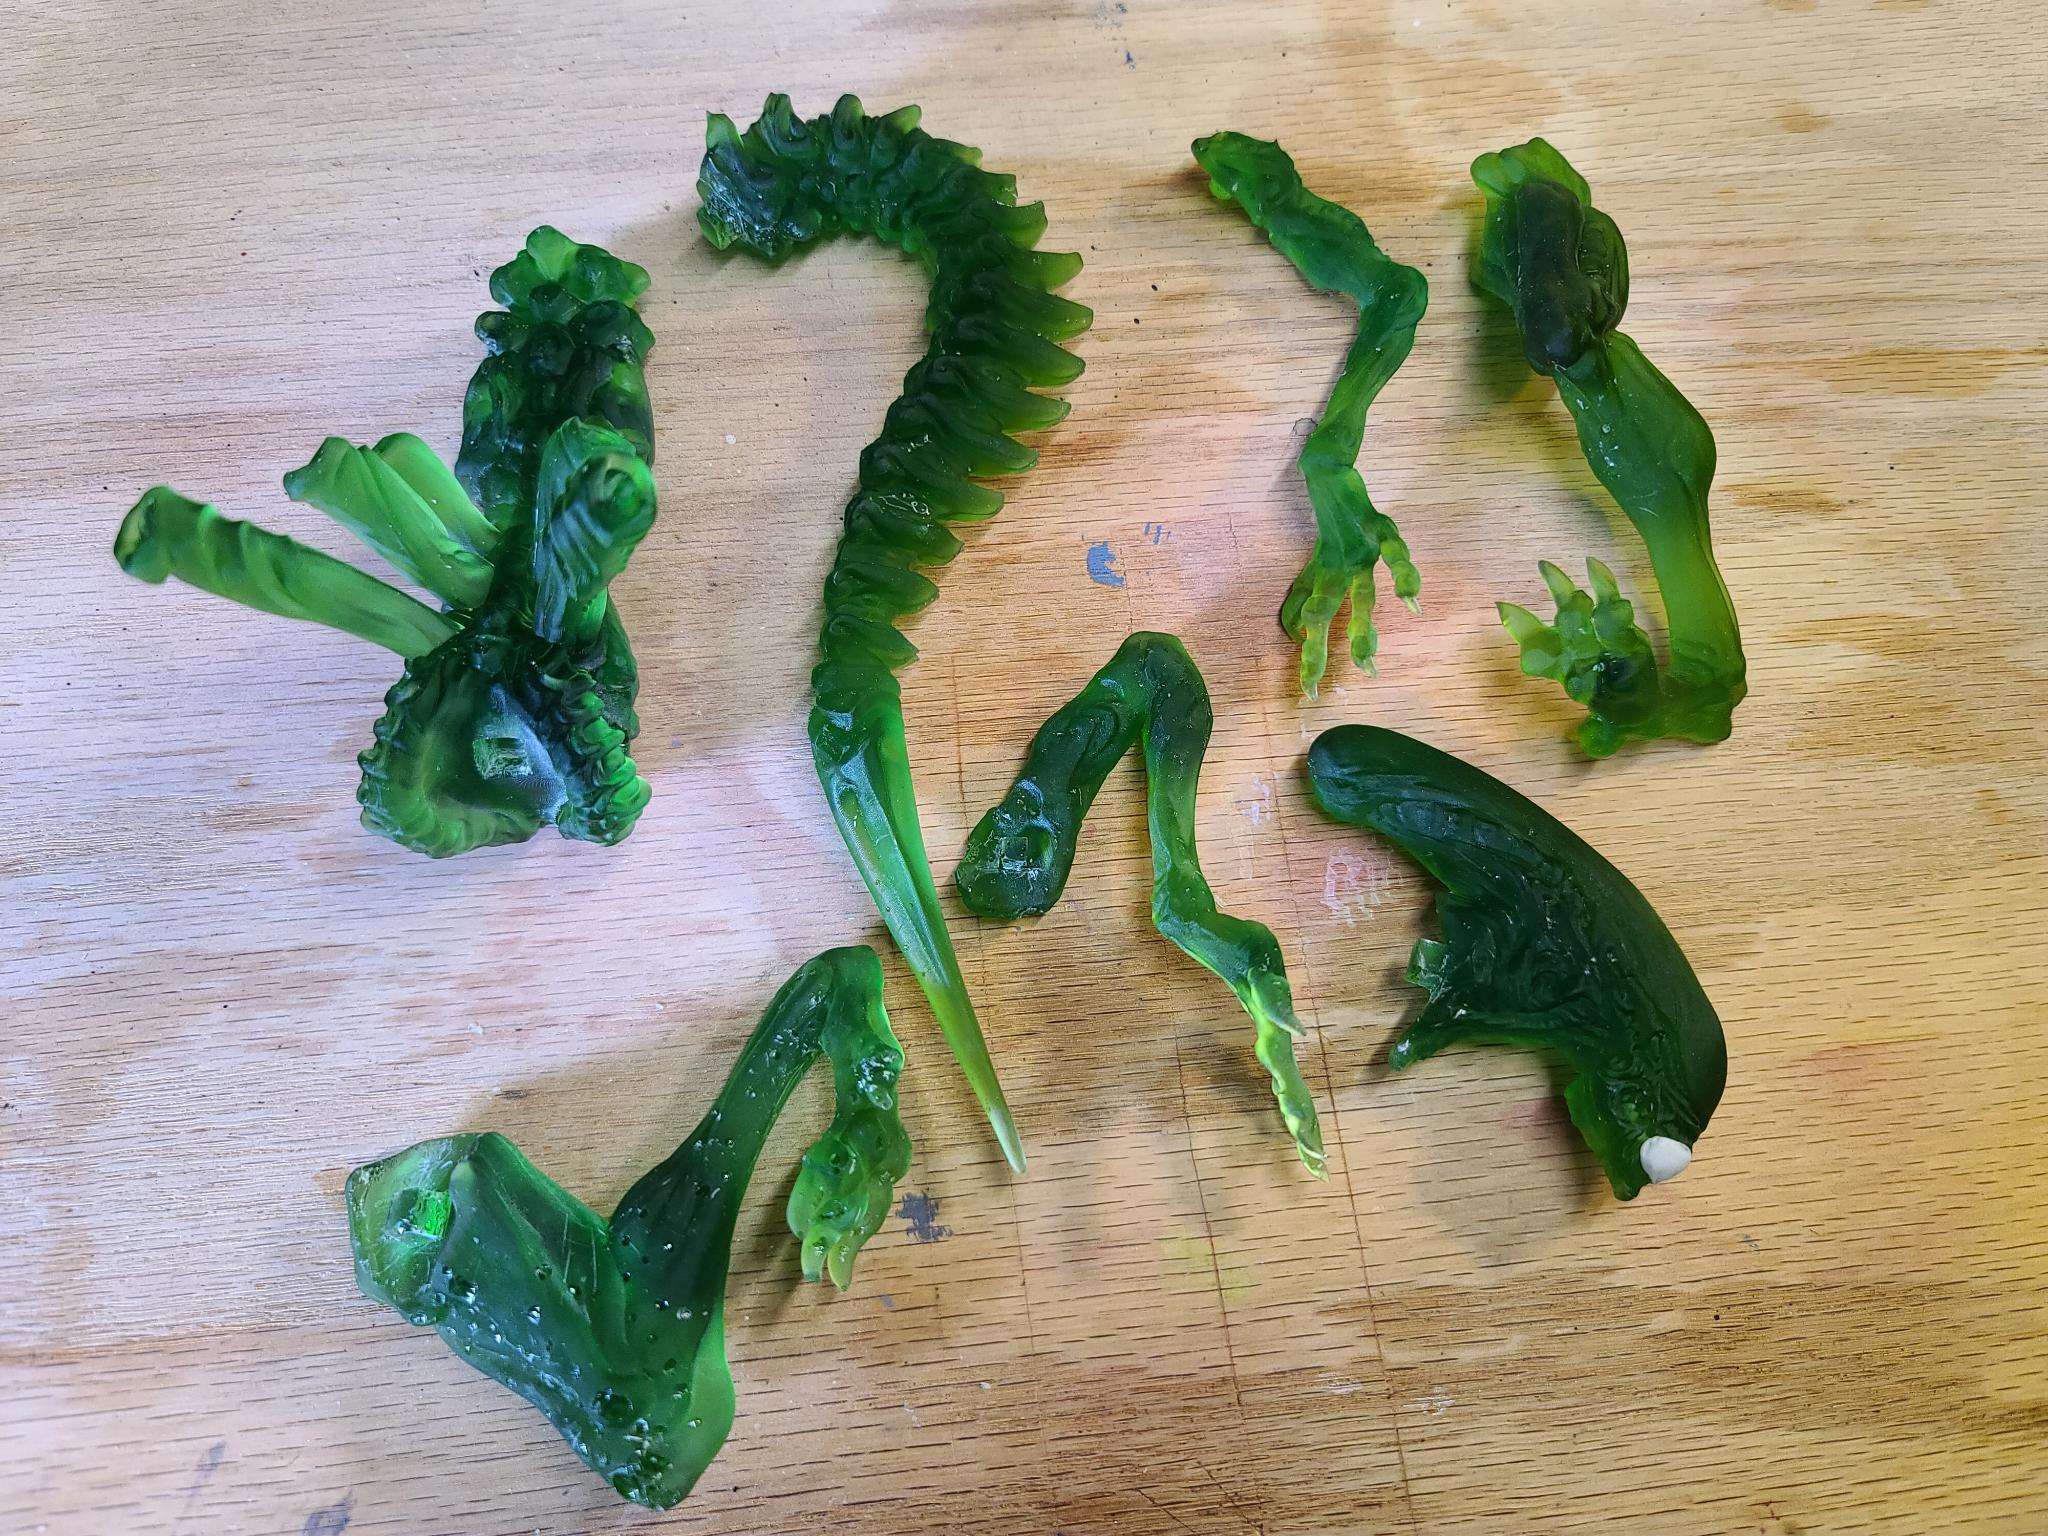
Next came the refining of the parts. I had to trim all the connecting joints so the parts would fit tightly to the parts they were meant to connect to. I didn't bother removing the pockmarks since after priming it will look fine on what is essentially a high gloss creature. The pockmarks will elevate the gloss to make it look more runny like drool.
I glued the pieces together and let sit over night to let the glue do it's thing. Something about the translucent green makes everything look very fragile, even though I print everything full.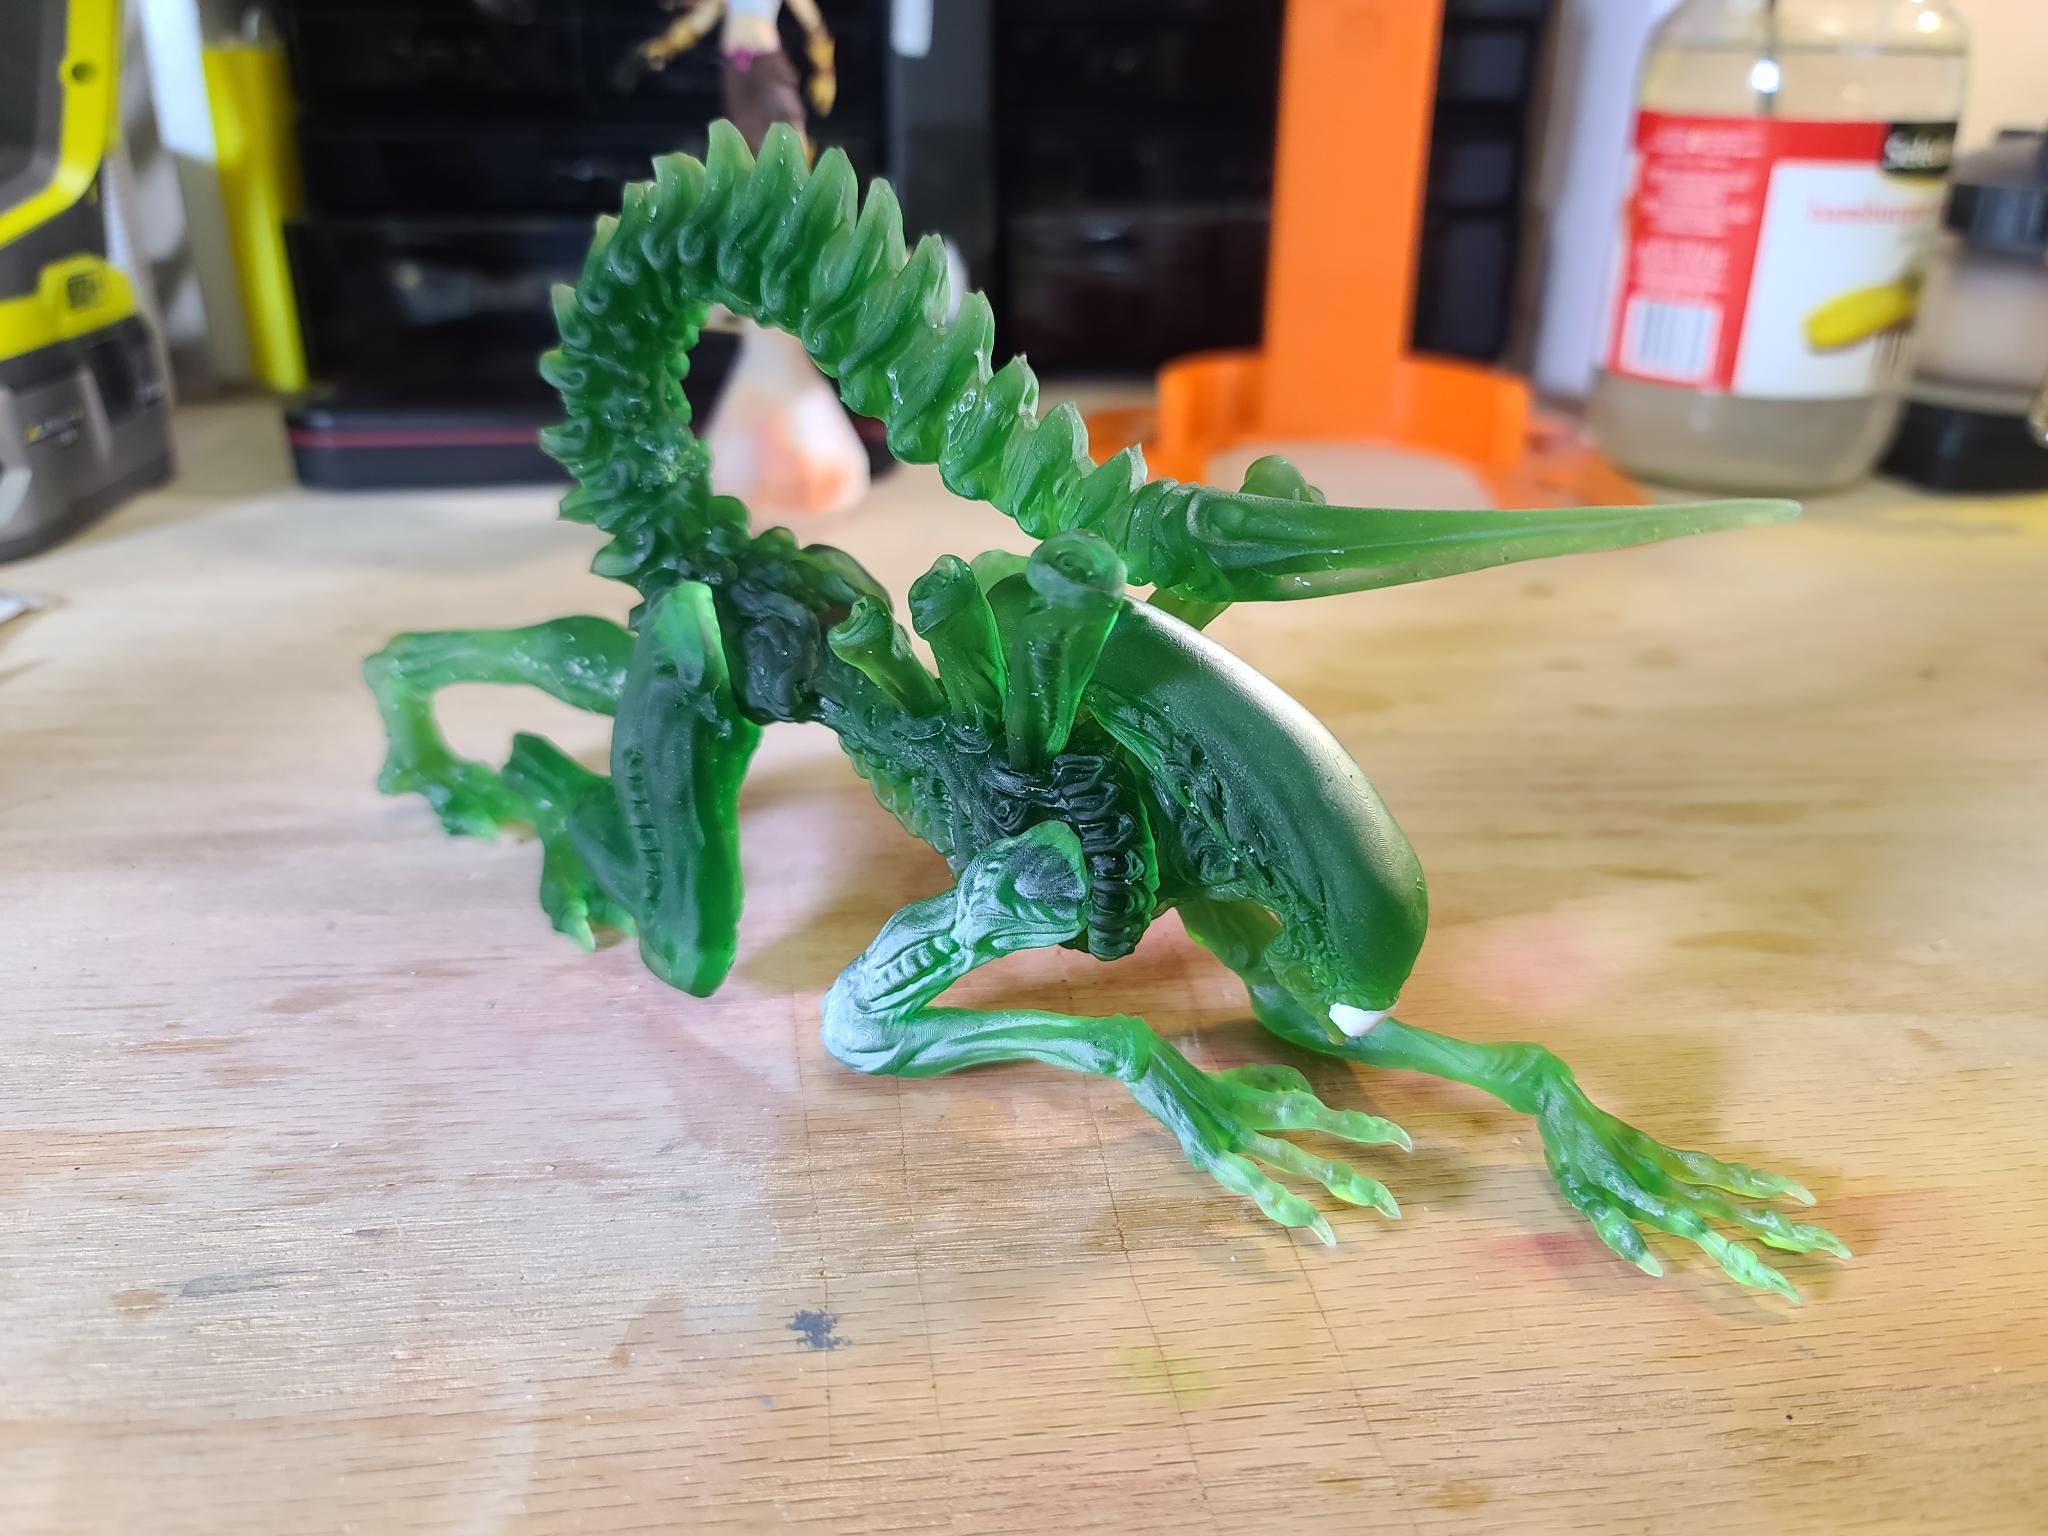
I primed it in Vallejo Black primer. This took a few coats since light would still make the green shine through. It looked cool but that wasn't quite the look I was going for. 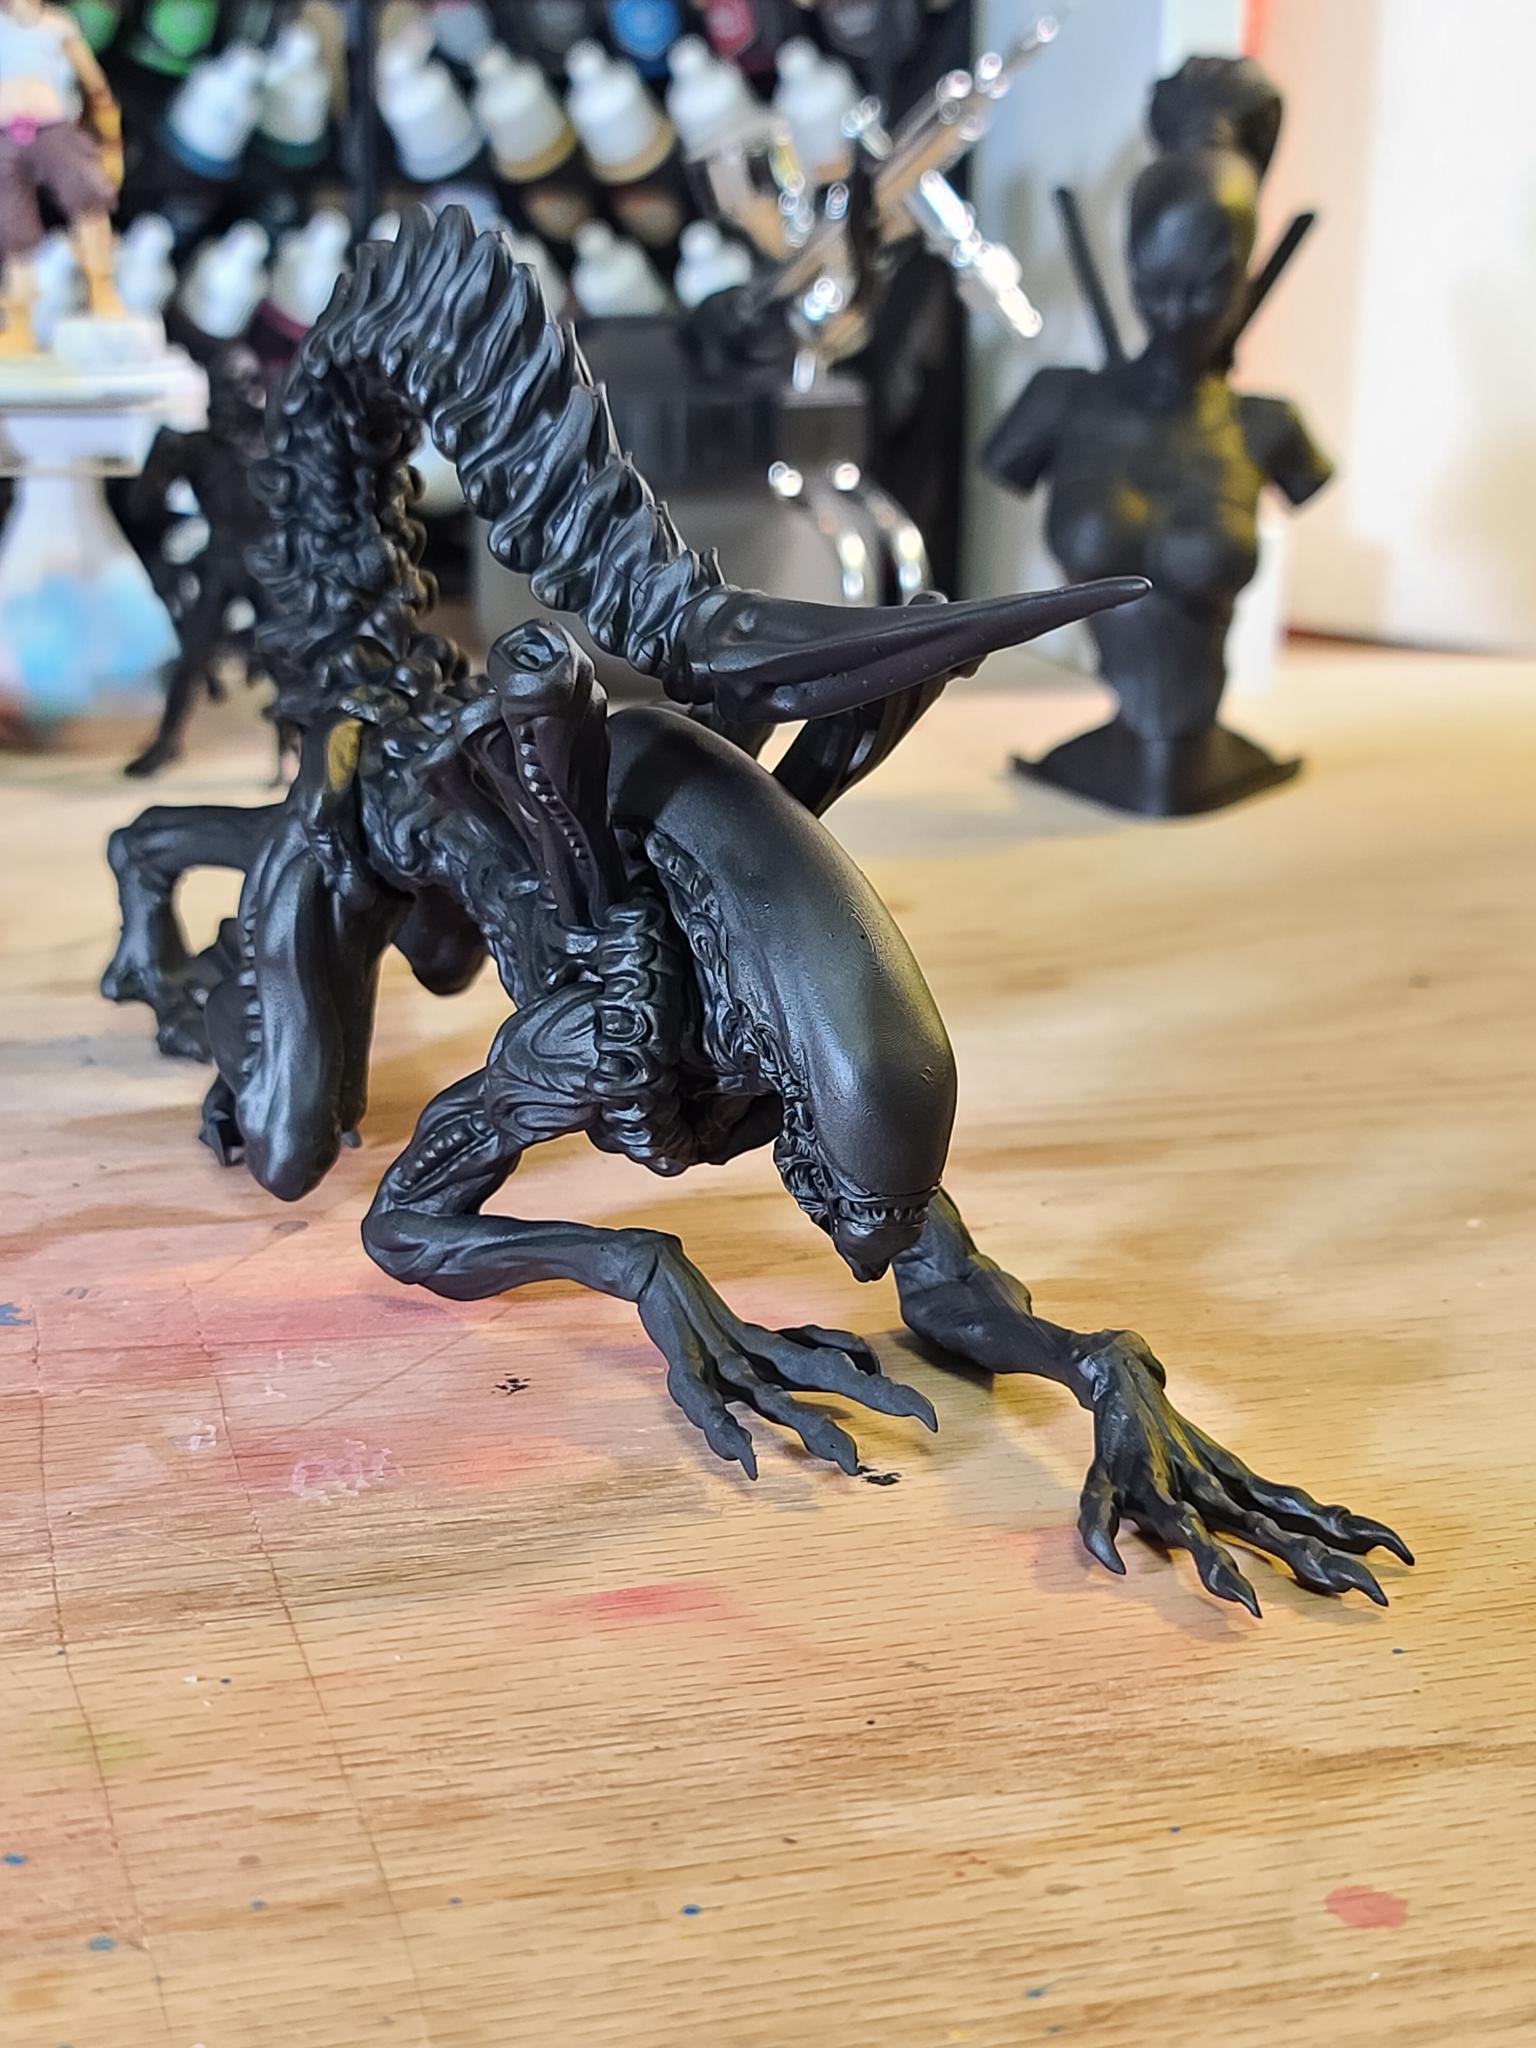
I removed the putty on the teeth and wow, did I use a bad putty, was such a pain to remove but it was all I had at the time. Now I will buy some better stuff made for masking. The results came out pretty good with the transparency. I'm going to add some clear resin to make it look like drooling and cure it with a UV light.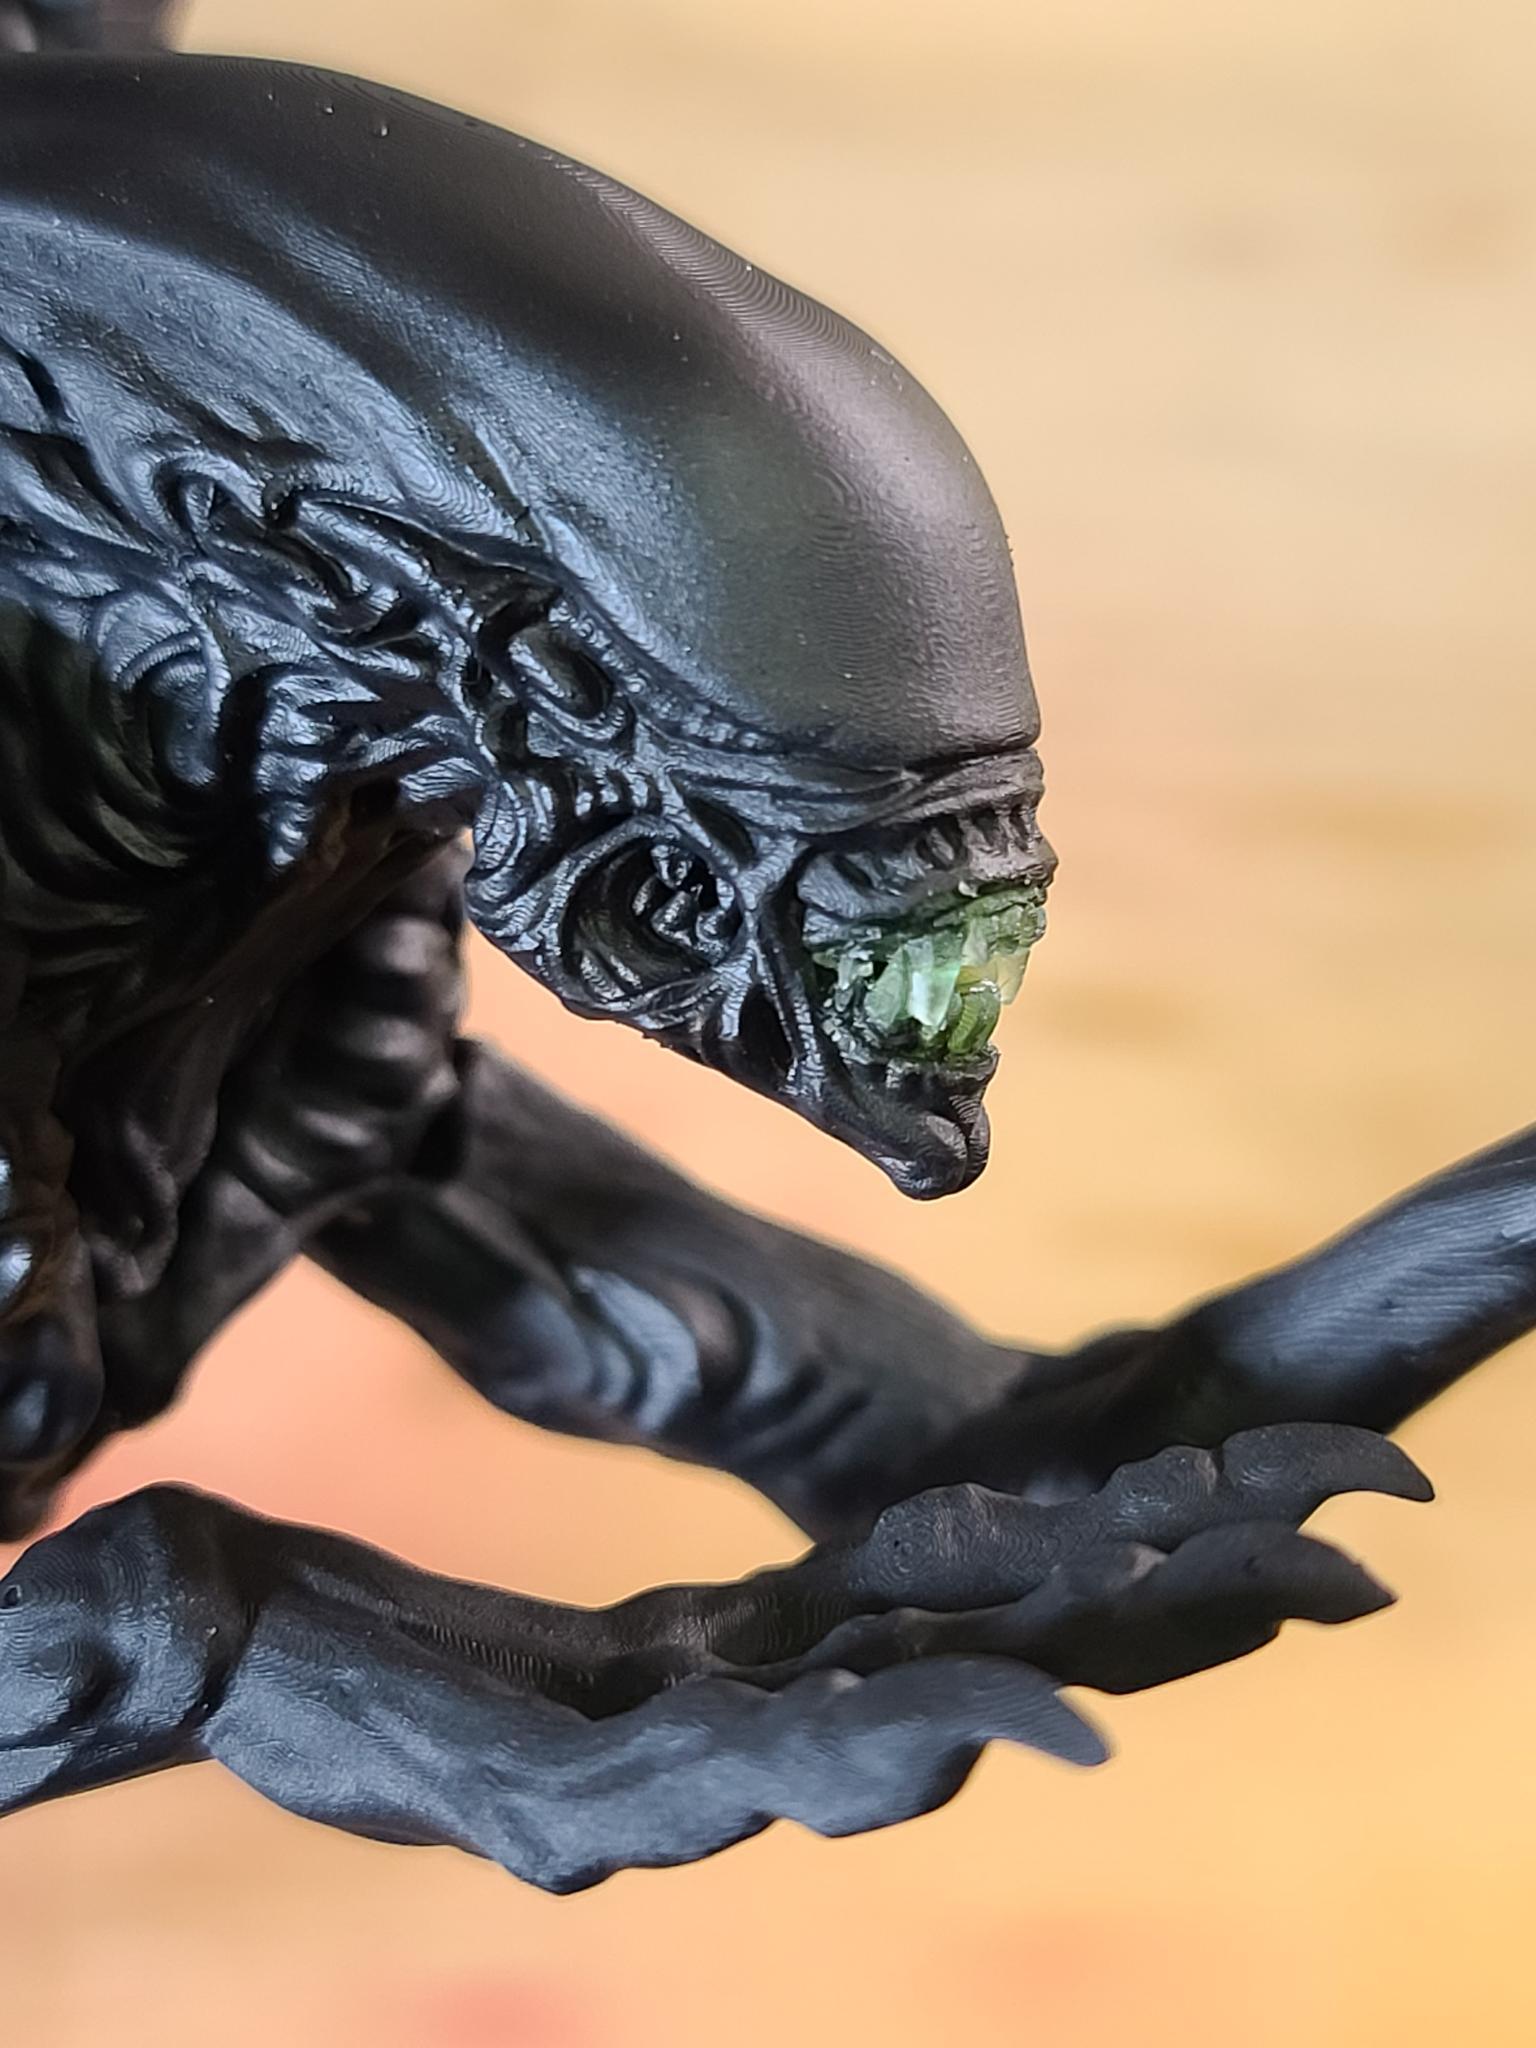
Thats pretty much it. All black clear teeth....